Checklists
Copyright © 2009-2016 Partaheikki Technologies
support@partaheikki.fi
Top-level View
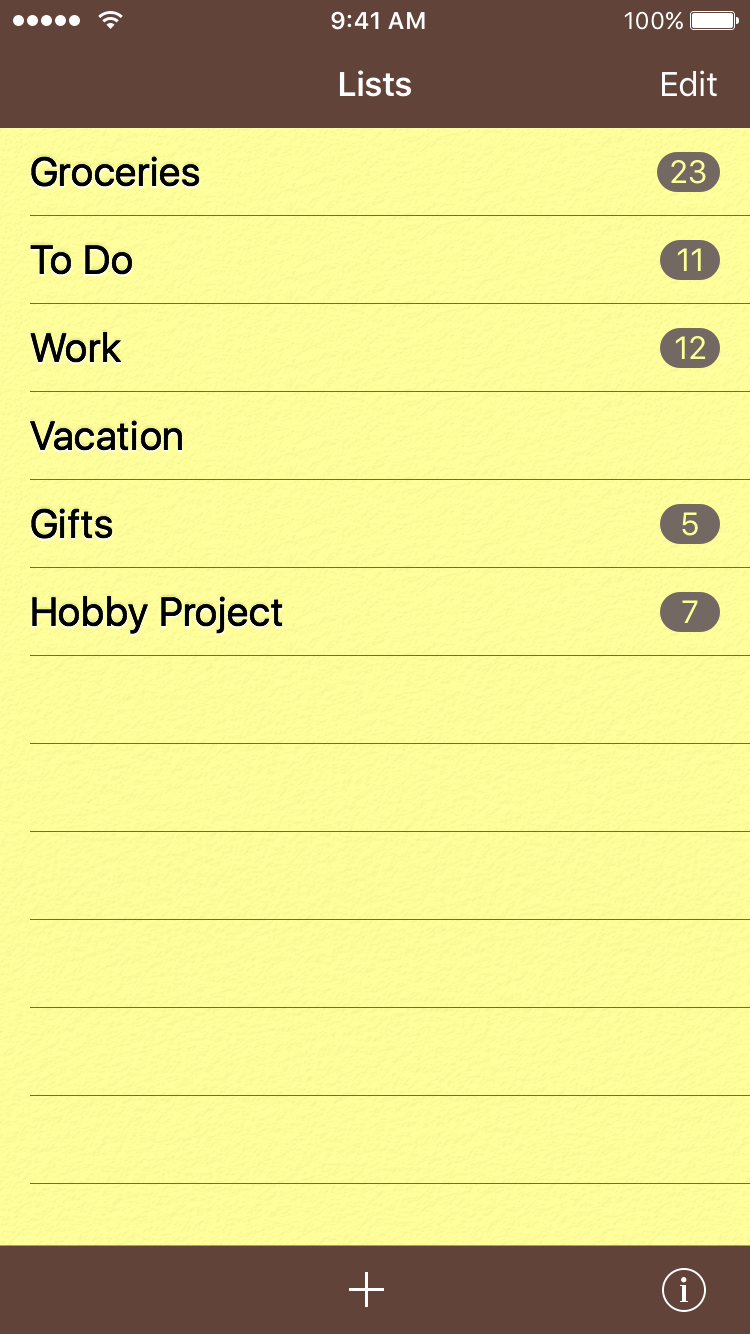 Your lists are visible in the top-level view of the application with a gray bubble showing the number of unchecked items in the list. The free version is limited to two lists and each list can contain ten active items (the number of saved items is unlimited). The application can be upgraded to the unlimited version using in-app purchase. The application will automatically ask about the purchase when the limits are reached but you can also use the Upgrade button to purchase the upgrade immediately. During the purchase process you will see the price of the upgrade and can decide whether to buy it or not. If you have already purchased the upgrade in one device, the full version will be activated in all additional devices linked to the same iTunes account without payment during the purchase process.
Simply tap on a list to view its contents. Tap on the Add button to add a new list. Tap on the Edit button to switch to the edit mode. In this mode you can edit the details of an existing list by tapping on its name. You can change the order of lists using the standard move controls. You can delete a list either by tapping on the delete button next to the list in the edit view or by using the standard horizontal swipe on a list in the normal view.
Adding a New List
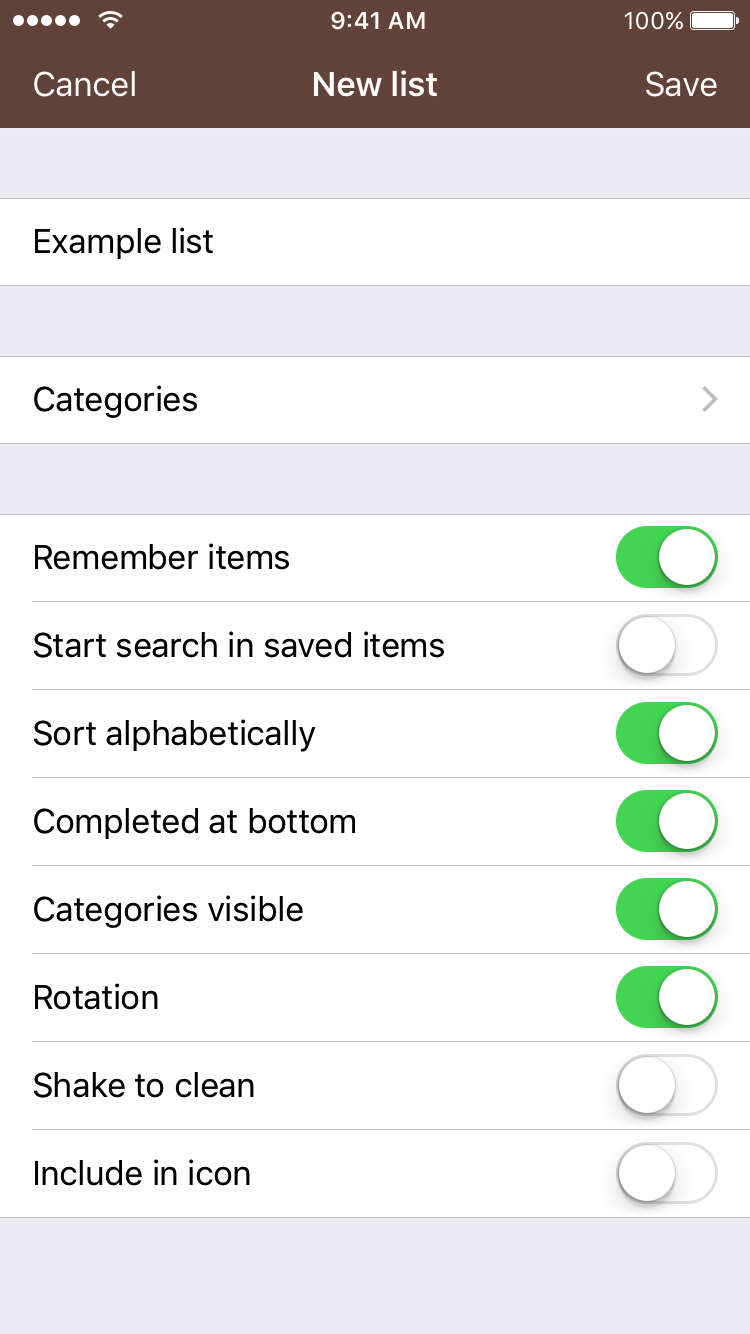 The New list view allows you to give a name to the list and set the options that control the behavior of the list. Tap on the Categories button to create and delete categories for the items in the list and set their names and ordering. Each list can be configured independently using the options below. The name of the view is Modify list when you are editing an existing list.
Remember items This option controls whether the list contains a database of previously used items. You can use it to quickly add recurring items to the list.
Start search in saved items This option controls whether the search starts in the list of current or previously used items. This is useful when you mostly add items to the current list from the list of previously used items.
Sort alphabetically This option controls whether the items can be arranged manually or whether they are sorted automatically in alphabetical order within their category.
Completed at bottom This option controls whether the completed items are automatically moved to the Completed category at the bottom of the list or left where they are.
Categories visible You can choose to show or hide the category names in the list. If the category names are not visible, the items will still be sorted according to their category, but there is more space available on the screen for the items.
Rotation You can let the list view rotate according to the orientation of the device or lock it into the portrait mode.
Shake to clean You can use the shake gesture to remove the completed items from the list if you turn this option on. When the completed items are removed, you will get feedback using vibration if vibration is turned on in the global settings. On devices that do not support vibration a sound effect is used instead.
Include in badge This option adds the number of unchecked items in the list to the application badge visible on the home screen.
Managing Categories
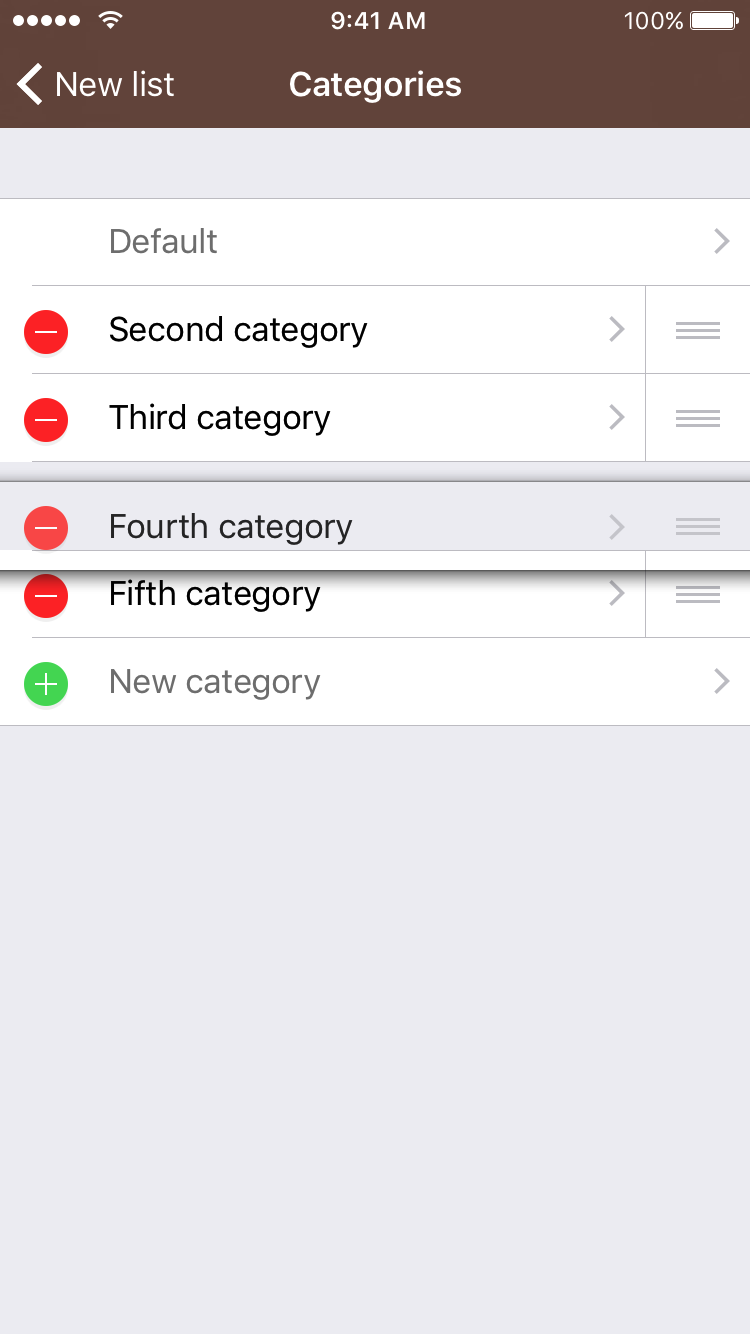 You can add and delete categories, change their order, and edit their names in the Categories view. Tap on the category to change its name. There is always a default category present, which is the default category for new items and cannot be removed. The default category does not have a visible name initially, but you can give it a name which makes it visible in the list. If a category is removed, all of its items are automatically moved to the default category. The categories can also be added, edited, and rearranged when adding and editing items.
List View
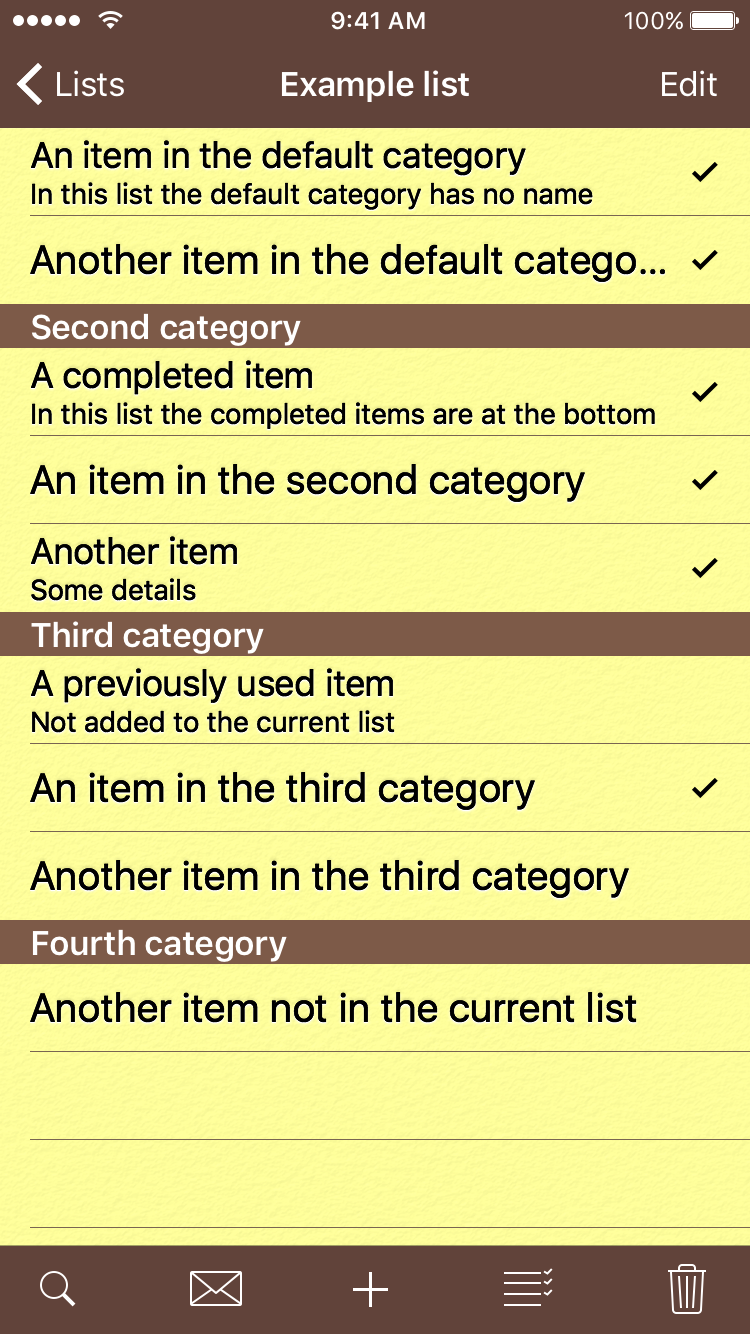
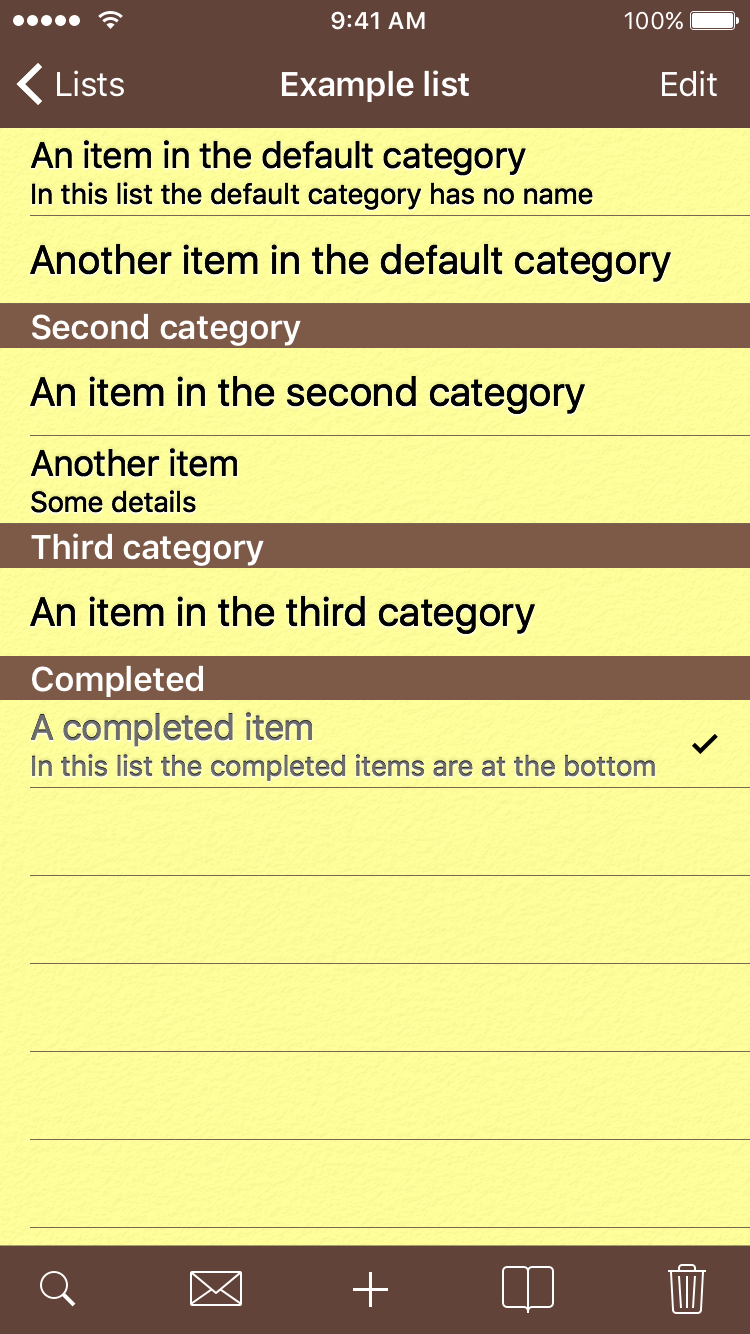 The items in your current list are visible in the list view. The items are sorted first according to their categories and within their categories either alphabetically or manually. The order of the categories can be changed by rearranging them in the list's settings or in the categories view when adding or editing items. Tap on the item to mark it completed and it becomes checked and turns gray. It also moves down to the Completed category at the bottom of the list if the Completed at bottom option is enabled in the settings of the list. Tapping on a completed item makes it incomplete again. Tap on the Add button to add items to the list.
You can use the Edit button to edit, delete, and rearrange items. The manual rearranging is available if the automatic sorting is disabled in the settings of the list. Items can also be deleted in the normal mode using the horizontal swipe. Tap on the Search button to quickly find the items you are looking for. You can search from the current list or from the previously used items using the Current and Saved buttons. Use the Send button ( ) to share the list with other people via email. The recipient will see the list as text in the email and can click on a button at the end of the list to open it in the Checklists application. If you open an existing list from email, the application lets you select between updating the existing list, replacing its contents, or creating a new list with the items in the email. This allows multiple people to manage the same lists and share their changes via email. You can also archive or share lists between multiple devices by sending them to yourself. Use the Trash button to quickly remove all items or just the completed items from the list. You can also use the shake gesture to remove completed items if you have turned on the Shake to clean option in the list's settings.
Adding and Editing Items
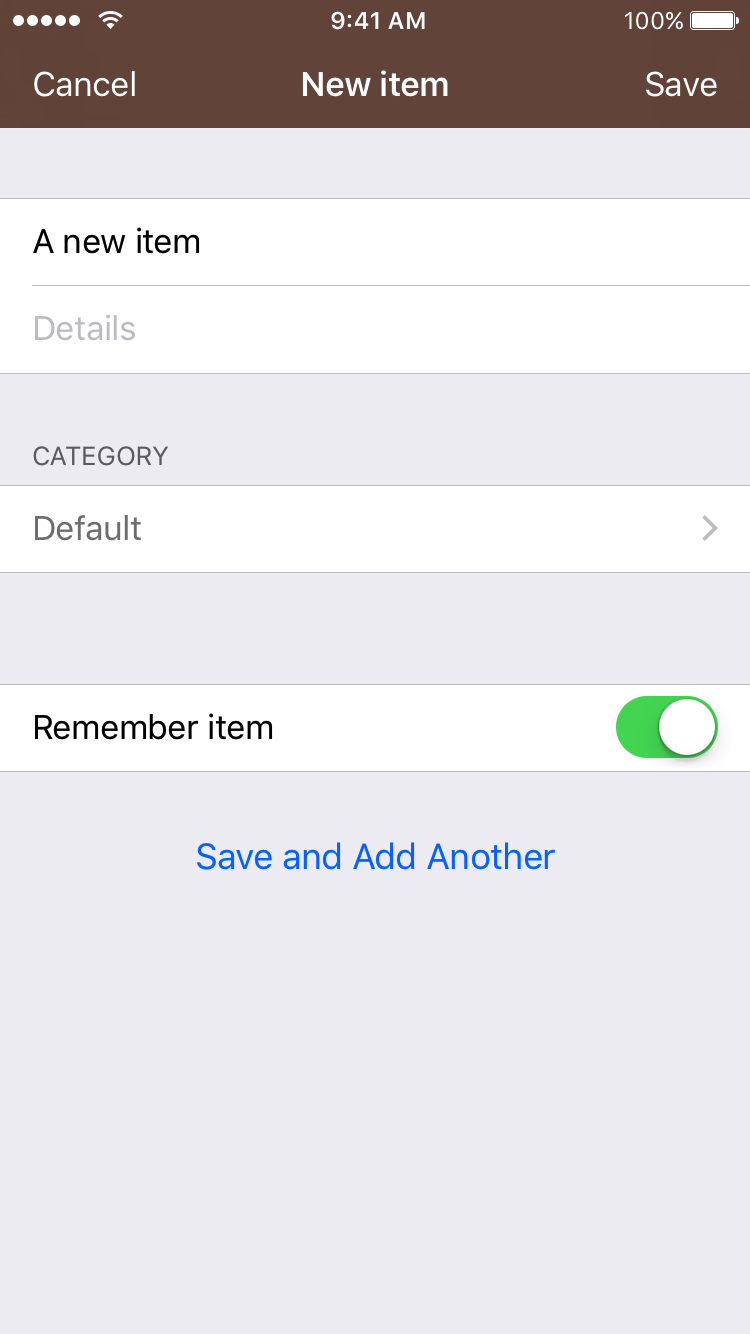 You can set the name and details of the item in the item view. The Category button allows you to select the category for the item. You can quickly add a new category for the item in the categories view by writing the name in the New category field and pressing the Done button, which adds the category at the bottom of the categories list and returns to the item view. You can select an existing category for the item by tapping on it. You can also freely add new categories, rearrange existing categories, edit their name, and delete some of them by tapping on the Edit button in the categories view.
If you are adding an item or modifying an existing item in the current list, the Remember item switch allows you to save the item in the database of previously used items. Note, however, that changes to the details field of an existing item are not copied to the corresponding saved item, which allows you to set the details for the current item only. This is useful if you want to add e.g. an amount to a shopping list item that is only valid this time. If you want to permanently change the details of an saved item, you can switch to the previously used items view and edit the item there.
If you are adding or editing an item in the previously used items list, the item view is otherwise the same as in the current items list, except that the switch can be used to select whether to add the item to the list of current items as well.
Switching Between the Current List and Previously Used Items
 The Checklists application is designed to be especially useful in situations in which you frequently use the same items, as is often the case in shopping lists. In these cases it makes sense to first switch to the previously used items list and quickly add some of them to the current list. After this you can switch back to the current items list and add new items and possibly modify the details of existing items. You can build up your database of common items by adding them to the current list and to the list of saved items at the same time. It is of course also possible to do it vice versa, i.e. by adding items directly to the list of saved items and to the current list at the same time.
Tap on the Bookmarks button ( ) to the view the database of previously used items. The list of previously used items slides in from the right and the Bookmarks button flips into the Current List button (
 ). The items present in the current list are marked with a checkmark. You can quickly add items to the current list by tapping on them. If you tap on an item marked with a checkmark, it is removed from the current list. In this view Add and Trash buttons apply to the saved items. Tap on the Current List button to switch back to the current items list and it will slide back in from the left.
Global Settings
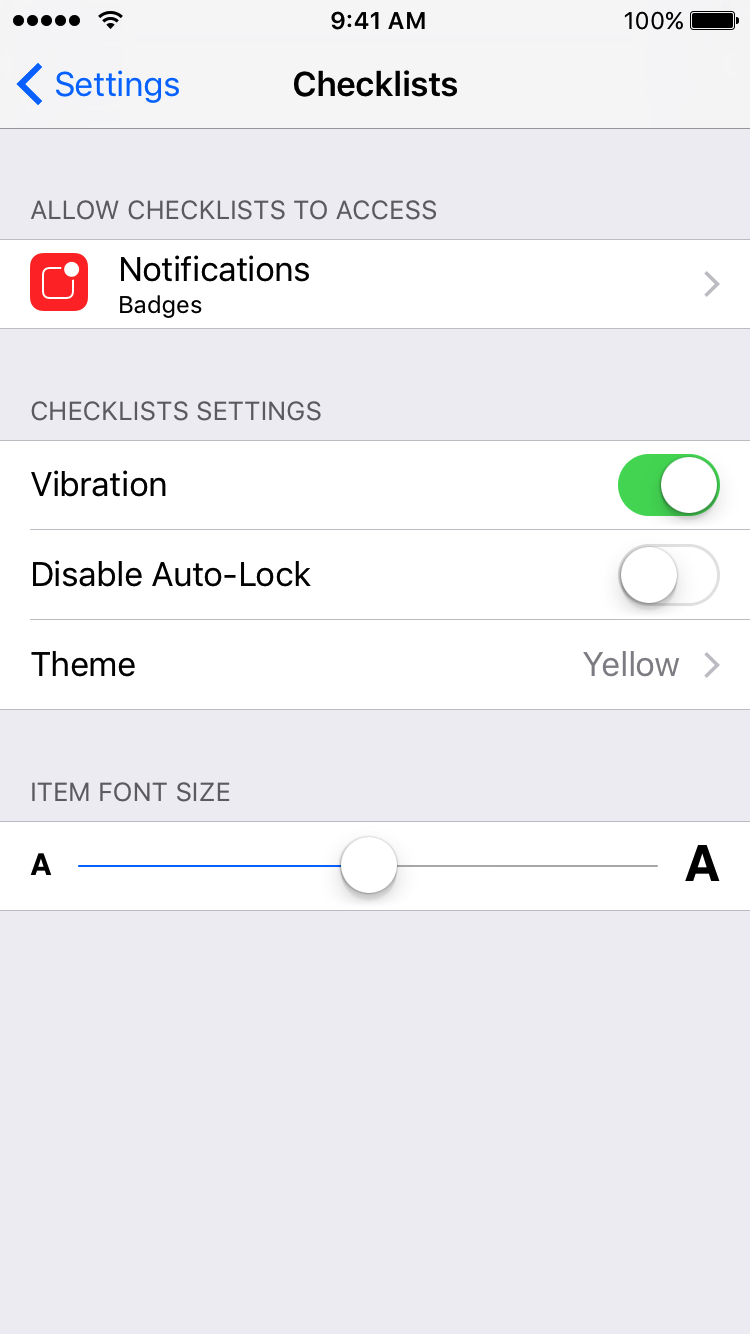 The Settings application is used to control the global settings of the Checklists application. You can enable or disable the vibration feedback and the device auto-lock when using Checklists, and set the theme as well as the text size of the items in lists.
Support
Feedback, feature requests, bug reports etc. are welcome at support@partaheikki.fi.